Download and Deploy
Download links:
You can import this OVA appliance to your vCenter infrastructure. It is based on CentOS 7 and has the VMware tools enabled.
The appliance requirements are kept to a strict minimum so it can be executed in any vCenter installation. However, before deploying it, please read the system requirements.
Follow the next steps to deploy a fully functional vOneCloud:
Step 1. Deploying the OVA
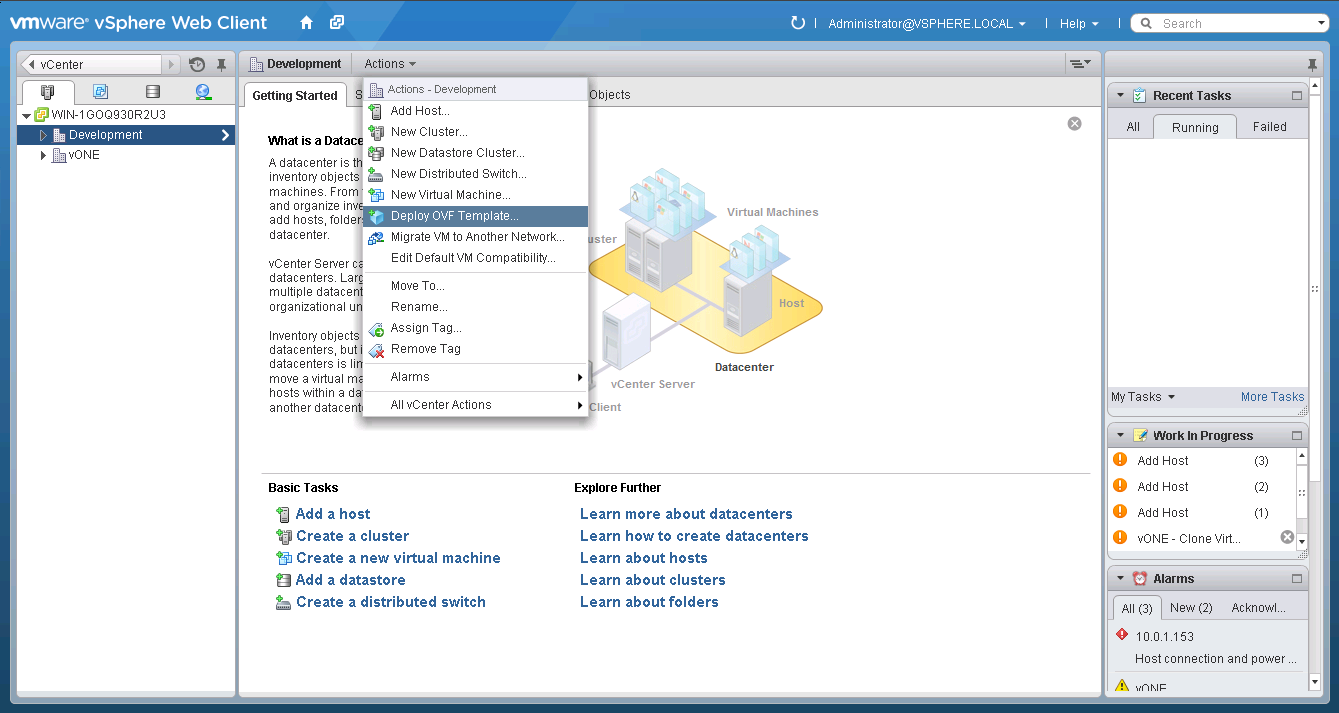
Login to your vCenter installation and select the appropriate datacenter and cluster, where you want to deploy the appliance. Select the Deploy OVF Template.
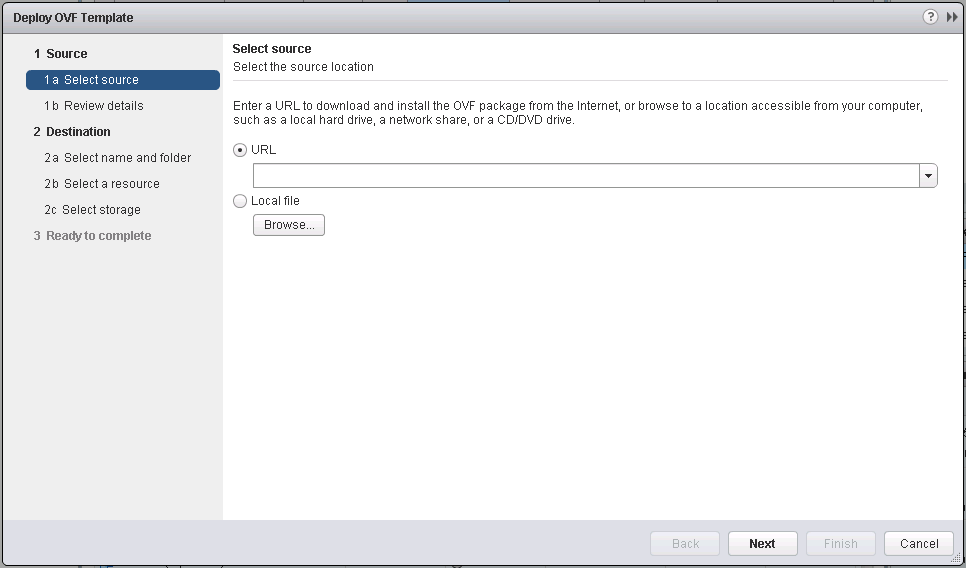
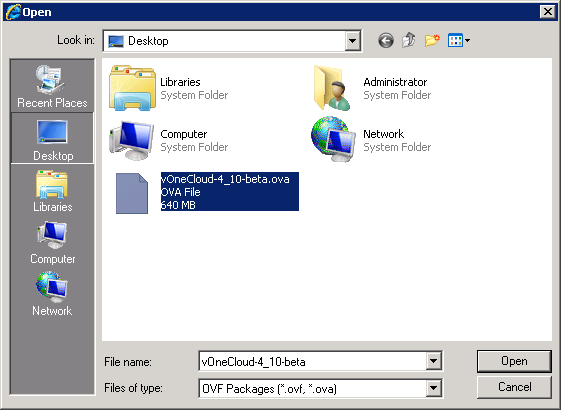
You have the option now to input the URL of the appliance (you can find it at the top of this page), or if you have previously downloaded it, you can simply browse to the download path as such:
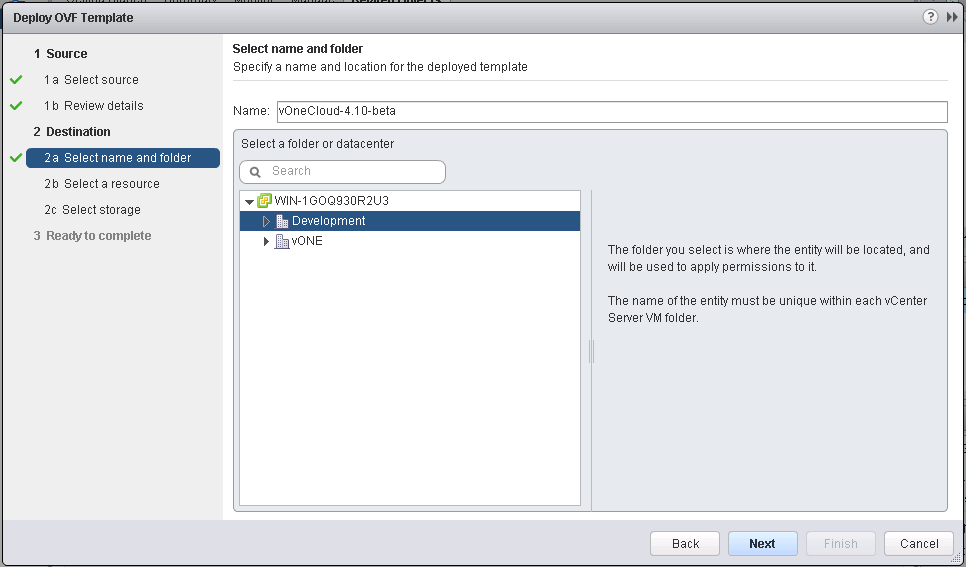
Select the name and folder:
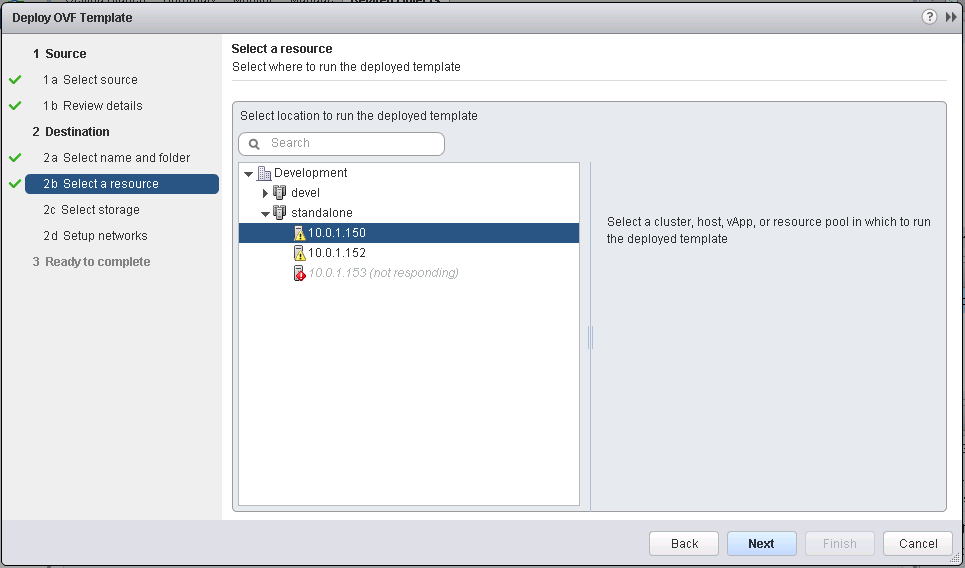
Select a resource to run the appliance:
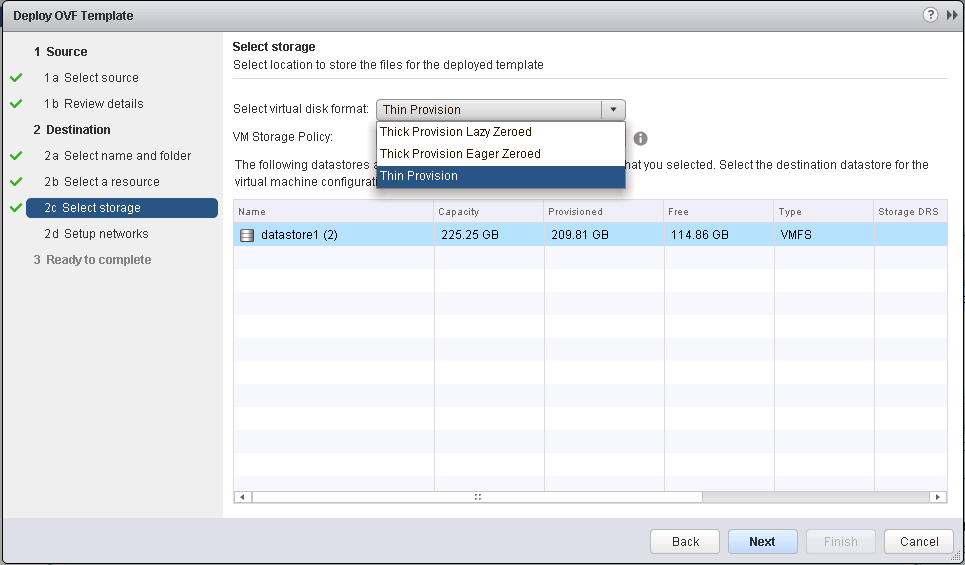
Select the datastore:
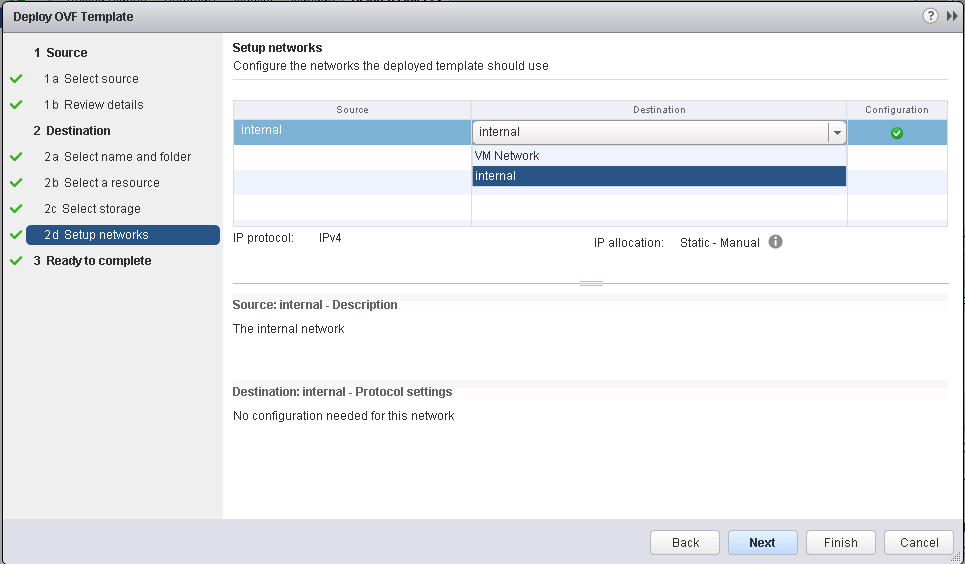
Select the Network. You will need to choose a network that has access to the ESX hosts.
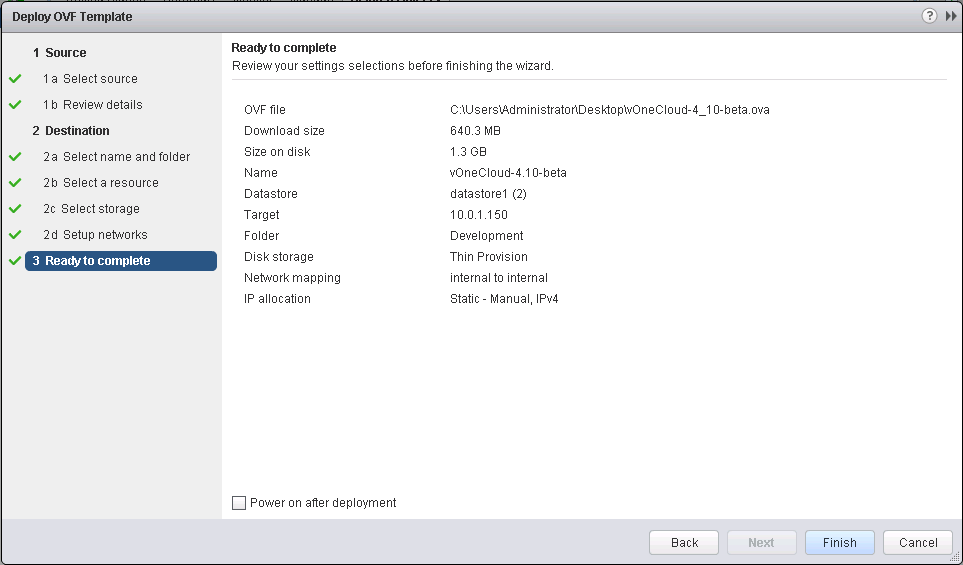
Review the settings selection and click finish. Wait for the Virtual Machine to appear in the cluster.
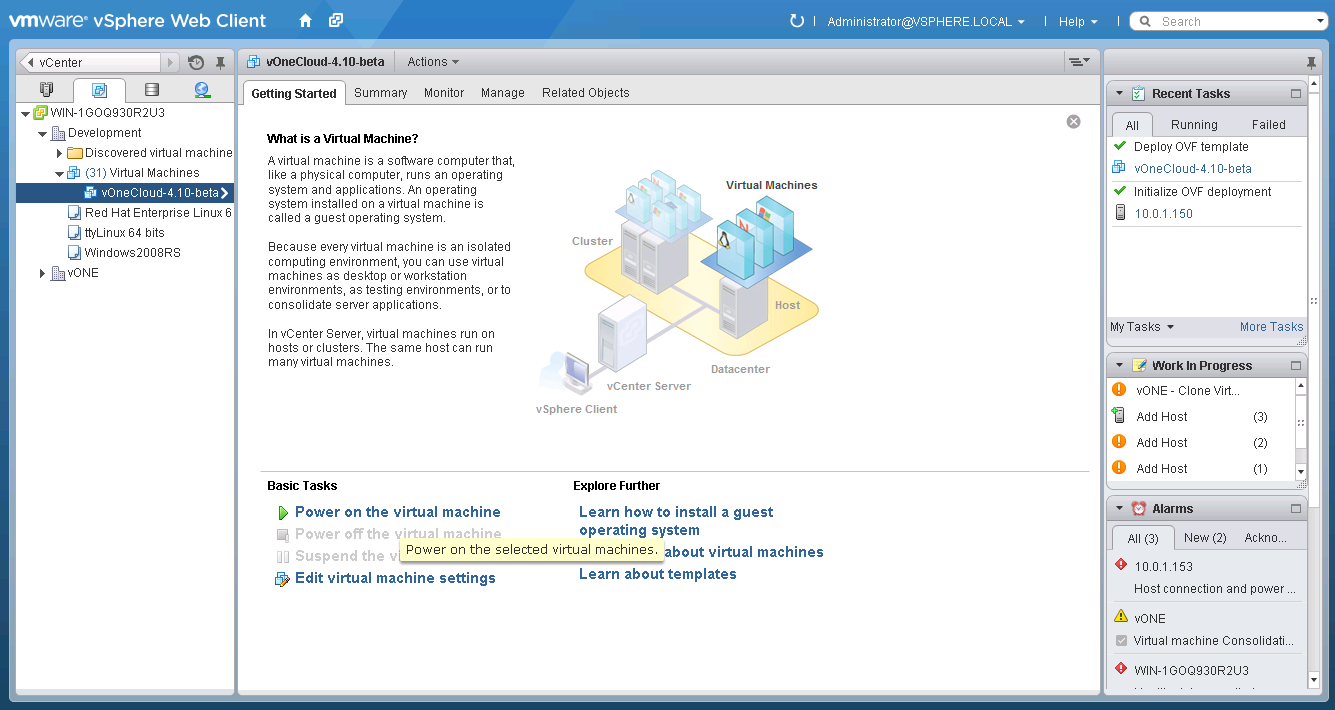
Now you can power on the Virtual Machine (to edit settings before, read this section):
Step 2. vOneCloud Control Console - Initial Configuration
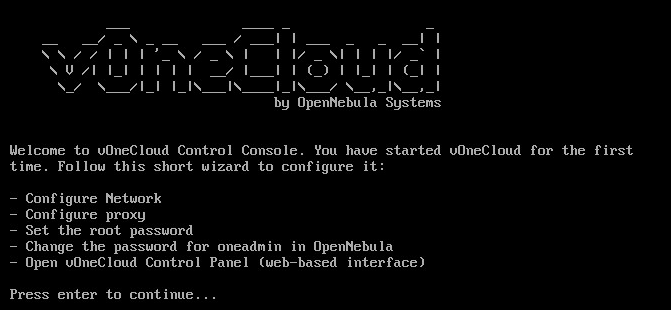
When the VM boots up you will see in the VM console in vCenter the vOneCloud Control Console, showing this wizard:
If you are presented instead with the following:

You are being presented with the wrong tty. You will need to press CTRL+ALT+F1 to access the Control Console.
In this wizard you need to configure the network. If you are using DHCP you can simply skip to the next item.
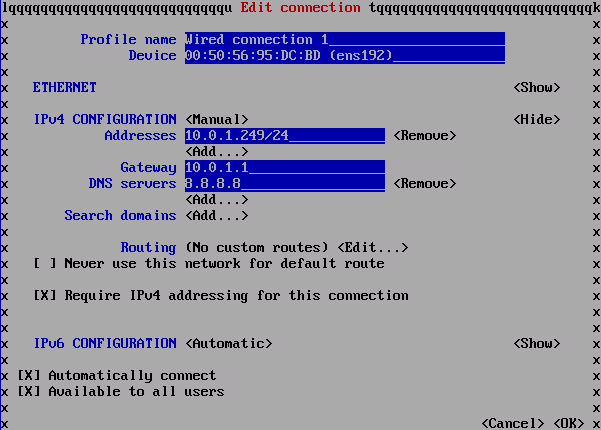
If you are using a static network configuration, answer yes and you will need to use a ncurses interface to:
- “Edit a connection”
- Select “Wired connection 1”
- Change IPv4 CONFIGURATION from <Automatic> to <Manual> and select “Show”
- Input the desired IP address/24 in Addresses
- Input Gateway and DNS Servers
- Select OK and then quit the dialog.
An example of static network configuration on the available network interface (see Editing the vOneCloud Appliance for information on how to add new interfaces to vOneCloud) on the 10.0.1.x class C network, with a gateway in 10.0.1.1 and using 8.8.8.8 as the DNS server:
Next, you can configure the proxy if your network topology requires a proxy to access the internet. However please note that it’s absolutely fine to use vOneCloud without any Internet access at all, as you will be able to do most of the things, except for automatic upgrades.
Afterwards you need to define a root password. You won’t be using this very often, so write it down somewhere safe. It’s your master password to the appliance.
The next item is the oneadmin account password. You will only need this to login to the vOneCloud Control Panel, a web-based configuration interface we will see very shortly. Check the Accounts section to learn more about vOneCloud roles and users.
We have now finished the vOneCloud Control Console initial configuration wizard. As the wizard itself will point out now you can open the vOneCloud Control Panel by pointing your browser to http://<appliance_ip>:8000 and using the oneadmin account and password just chosen.
Step 3. vOneCloud Control Panel - Manage Services
The vOneCloud Control Panel will allow the administrator to:
- Check for new vOneCloud versions and manage upgrades.
- Configure Active Directory / LDAP integration
- Configure SSL (https) access
- Enable/Disable ssh
- Start the OpenNebula services
- Manage automatic upgrades.
Click on the configuration icon if you need to configure one of the supported options. Keep in mind that you can run this configuration at any moment. We recommend to start inspecting vOneCloud’s functionality before delving into advanced configuration options like the aforementioned ones.
After clicking on the Start button, proceed to log in to Sunstone (OpenNebula’s frontend) by opening: http://<appliance_ip> and using the default login CloudAdmin / CloudAdmin user and password.
Note
There is a guide available that documents the configuration interfaces of the appliance here.
Step 4. Enjoy the Out-of-the-Box Features
After opening the Sunstone interface (http://<appliance_ip> with CloudAdmin / CloudAdmin user and password) you are now ready to enjoy the out-of-the-box features of vOneCloud!
Move on to the next section to start using your cloud by importing your vCenter infrastructure.
Login to the Appliance
Warning
If you make any changes to OpenNebula configuration files under /etc/one please note that they will be either discarded in the next upgrade, or overwritten by vOneCloud Control Center. Keep in mind that only those features configurable in Sunstone or in vOneCloud Control Console and Control Panel are officially supported. Any other customizations are not supported by vOneCloud Support.
All the functionality you need to run your vOneCloud can be accessed via Sunstone, and all the support configuration parameters are available either in the vOneCloud Control Console or in the vOneCloud Control Panel.
To access the vOneCloud command line interface, first enable SSH and ssh to the host using the root account and password. In OS X and Linux environments, simply use ssh to log into the root account of vOneCloud’s IP. For Windows environments you can use software like PuTTY or even SFTP clients like WinSCP if you are simply uploading or downloading-modifying-uploading files in order to make customization as documented by the Advanced Customizations section.
Alternatively, open the vCenter console of the vOneCloud Virtual Machine appliance and change the tty (Ctrl + Alt + F2). Afterwards, log in with the root account and the password you used in the initial configuration, and switch to the oneadmin user.
Editing the vOneCloud Appliance
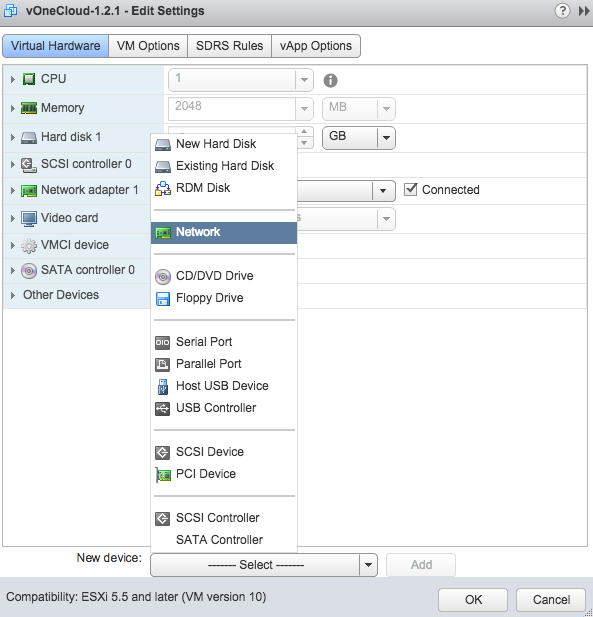
After importing the vOneCloud OVA, and before powering it on, the vOneCloud Virtual Machine can be edited to, for instance, add a new network interface, increase the amount of RAM, the available CPUs for performance, etc.
In order to achieve this, please right click on the vOneCloud VM, and select Edit Settings. The next dialog should pop up:
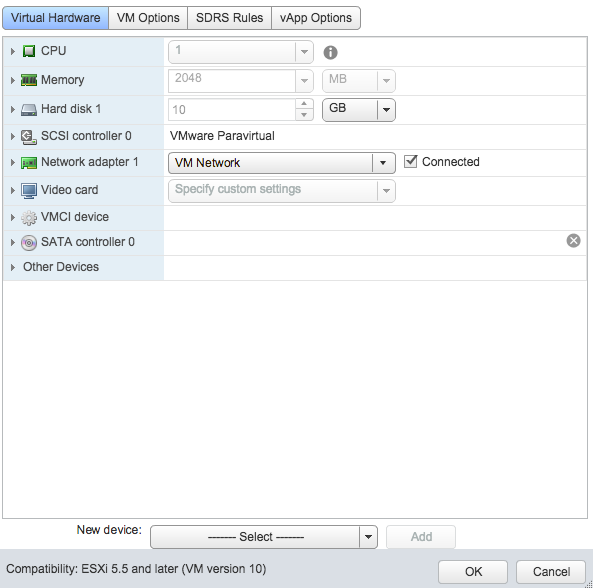
If you want for instance to add a new network interface, select Network from the dropdown in New device (at the botton of the dialog):